本教程使用到 conda 安装虚拟环境,而 cloud studio 容器中默认已经安装好了,并且使用到 jupyter notebook 进行演示,如果不知道如何安装环境,可以参考 Cloud Studio 搭建 anaconda 环境 安装 jupyter notebook
安装运行环境
 1
 2
 3
 4
 5
 6
 7
 8
 9
10
11
12
| # 安装软件包
conda create --name unsloth_env \
python=3.11 \
pytorch-cuda=12.1 \
pytorch cudatoolkit xformers -c pytorch -c nvidia -c xformers \
-y
# 激活虚拟环境
conda activate unsloth_env
# 安装 unsloth
pip install unsloth
|
下载 qwen2.5 模型
这里介绍通过离线下载方式,先将 qwen2.5 7b 模型先下载到本地。使用的是 Huggingface-cli, 它是 Hugging Face 官方提供的命令行工具,支持下载功能。
使用的是 unsloth 官方提供的模型
https://huggingface.co/unsloth/Qwen2.5-7B
1
2
3
4
5
6
7
8
| # 安装依赖
pip install -U huggingface_hub
# 设置环境变量
export HF_ENDPOINT=https://hf-mirror.com
# 下载模型
huggingface-cli download --resume-download unsloth/Qwen2.5-7B --local-dir Qwen2.5-7B
|
加载训练模型
 1
 2
 3
 4
 5
 6
 7
 8
 9
10
11
12
13
14
15
16
17
18
19
20
| from unsloth import FastLanguageModel
import torch
max_seq_length = 2048 # Choose any! We auto support RoPE Scaling internally!
dtype = None # None for auto detection. Float16 for Tesla T4, V100, Bfloat16 for Ampere+
load_in_4bit = True # Use 4bit quantization to reduce memory usage. Can be False.
model, tokenizer = FastLanguageModel.from_pretrained(
# Can select any from the below:
# "unsloth/Qwen2.5-0.5B", "unsloth/Qwen2.5-1.5B", "unsloth/Qwen2.5-3B"
# "unsloth/Qwen2.5-14B", "unsloth/Qwen2.5-32B", "unsloth/Qwen2.5-72B",
# And also all Instruct versions and Math. Coding verisons!
# 这里是远程自动下载方式
#model_name = "unsloth/Qwen2.5-7B",
# 这里是离线下载的本地路径
model_name = "/workspace/model/Qwen2.5-7B",
max_seq_length = max_seq_length,
dtype = dtype,
load_in_4bit = load_in_4bit,
# token = "hf_...", # use one if using gated models like meta-llama/Llama-2-7b-hf
)
|
添加 LoRA 适配器
 1
 2
 3
 4
 5
 6
 7
 8
 9
10
11
12
13
14
| model = FastLanguageModel.get_peft_model(
model,
r = 16, # Choose any number > 0 ! Suggested 8, 16, 32, 64, 128
target_modules = ["q_proj", "k_proj", "v_proj", "o_proj",
"gate_proj", "up_proj", "down_proj",],
lora_alpha = 16,
lora_dropout = 0, # Supports any, but = 0 is optimized
bias = "none", # Supports any, but = "none" is optimized
# [NEW] "unsloth" uses 30% less VRAM, fits 2x larger batch sizes!
use_gradient_checkpointing = "unsloth", # True or "unsloth" for very long context
random_state = 3407,
use_rslora = False, # We support rank stabilized LoRA
loftq_config = None, # And LoftQ
)
|
加载训练数据
使用 alpaca 格式模板,也可以到 huggingface 上下载数据集
 1
 2
 3
 4
 5
 6
 7
 8
 9
10
11
12
13
14
15
16
17
18
19
20
21
22
23
24
25
26
27
28
| alpaca_prompt = """Below is an instruction that describes a task, paired with an input that provides further context. Write a response that appropriately completes the request.
### Instruction:
{}
### Input:
{}
### Response:
{}"""
EOS_TOKEN = tokenizer.eos_token # Must add EOS_TOKEN
def formatting_prompts_func(examples):
instructions = examples["instruction"]
inputs = examples["input"]
outputs = examples["output"]
texts = []
for instruction, input, output in zip(instructions, inputs, outputs):
# Must add EOS_TOKEN, otherwise your generation will go on forever!
text = alpaca_prompt.format(instruction, input, output) + EOS_TOKEN
texts.append(text)
return { "text" : texts, }
pass
from datasets import load_dataset
# 这里使用离线的方式下载好数据集
dataset = load_dataset("/workspace/sft/dataset/alpaca-cleaned", split = "train")
dataset = dataset.map(formatting_prompts_func, batched = True,)
|
模型训练
 1
 2
 3
 4
 5
 6
 7
 8
 9
10
11
12
13
14
15
16
17
18
19
20
21
22
23
24
25
26
27
28
29
30
31
32
| from trl import SFTTrainer
from transformers import TrainingArguments
from unsloth import is_bfloat16_supported
trainer = SFTTrainer(
model = model,
tokenizer = tokenizer,
train_dataset = dataset,
dataset_text_field = "text",
max_seq_length = max_seq_length,
dataset_num_proc = 2,
packing = False, # Can make training 5x faster for short sequences.
args = TrainingArguments(
per_device_train_batch_size = 2,
gradient_accumulation_steps = 4,
warmup_steps = 5,
# num_train_epochs = 1, # Set this for 1 full training run.
max_steps = 60,
learning_rate = 2e-4,
fp16 = not is_bfloat16_supported(),
bf16 = is_bfloat16_supported(),
logging_steps = 1,
optim = "adamw_8bit",
weight_decay = 0.01,
lr_scheduler_type = "linear",
seed = 3407,
output_dir = "outputs",
report_to = "none", # Use this for WandB etc
),
)
trainer_stats = trainer.train()
|
推理
训练完成后,我们就可以针对模型进行推理测试
 1
 2
 3
 4
 5
 6
 7
 8
 9
10
11
12
13
| # alpaca_prompt = Copied from above
FastLanguageModel.for_inference(model) # Enable native 2x faster inference
inputs = tokenizer(
[
alpaca_prompt.format(
"Continue the fibonnaci sequence.", # instruction
"1, 1, 2, 3, 5, 8", # input
"", # output - leave this blank for generation!
)
], return_tensors = "pt").to("cuda")
outputs = model.generate(**inputs, max_new_tokens = 64, use_cache = True)
tokenizer.batch_decode(outputs)
|
保存训练后的模型
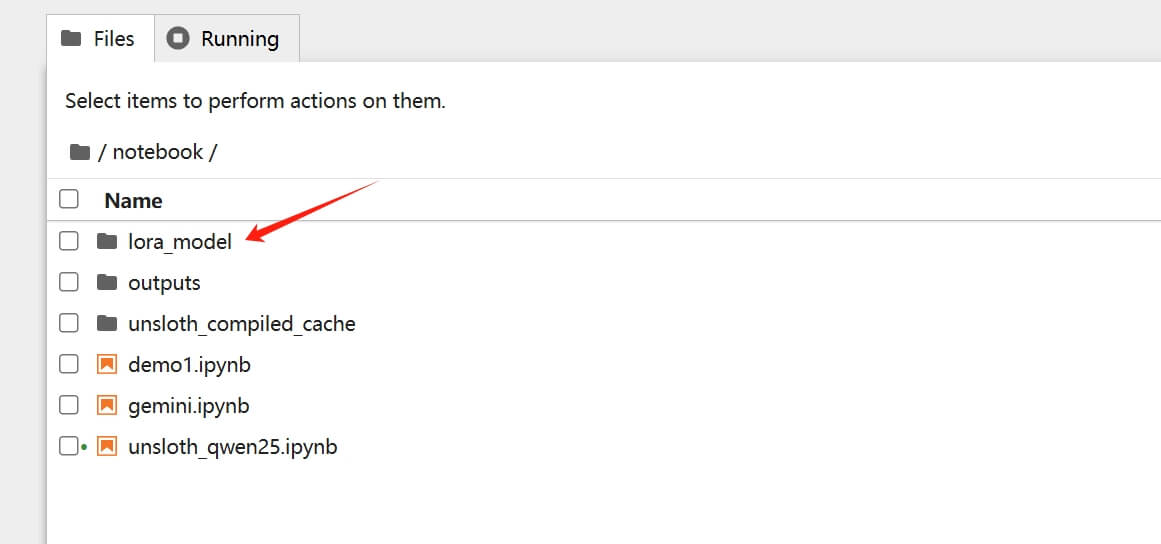
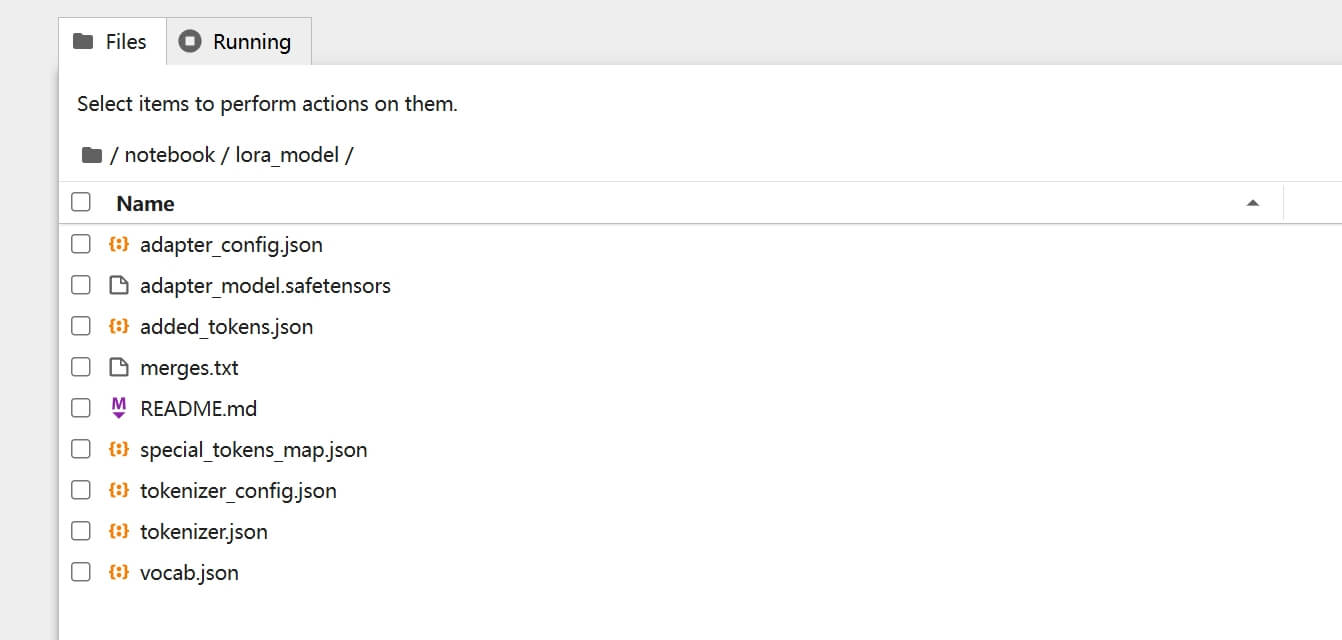
将上面训练后的模型保存到本地为 lora_model 的目录里
1
2
3
4
| model.save_pretrained("lora_model") # Local saving
tokenizer.save_pretrained("lora_model")
# model.push_to_hub("your_name/lora_model", token = "...") # Online saving
# tokenizer.push_to_hub("your_name/lora_model", token = "...") # Online saving
|


导出至 Ollama
可以将经过微调的模型导出为 GGUF 格式,这样就可以在一些 UI 系统中使用如 open webui,或者导出至 Ollama 中直接使用
需要先安装 cmake 环境,可查看 Cloud Studio 软件环境安装 关于 cmake 安装的部分
使用 q4_k_m 格式
选择的量化方法是 q4_k_m 格式,即打开以下为 True 的方法
如果提示 Could NOT find CURL (missing: CURL_LIBRARY CURL_INCLUDE_DIR),需要额外安装 apt install libcurl4-openssl-dev
 1
 2
 3
 4
 5
 6
 7
 8
 9
10
11
12
13
14
15
16
17
18
19
20
21
22
| # Save to 8bit Q8_0
if False: model.save_pretrained_gguf("model", tokenizer,)
# Remember to go to https://huggingface.co/settings/tokens for a token!
# And change hf to your username!
if False: model.push_to_hub_gguf("hf/model", tokenizer, token = "")
# Save to 16bit GGUF
if False: model.save_pretrained_gguf("model", tokenizer, quantization_method = "f16")
if False: model.push_to_hub_gguf("hf/model", tokenizer, quantization_method = "f16", token = "")
# Save to q4_k_m GGUF
if True: model.save_pretrained_gguf("model", tokenizer, quantization_method = "q4_k_m")
if False: model.push_to_hub_gguf("hf/model", tokenizer, quantization_method = "q4_k_m", token = "")
# Save to multiple GGUF options - much faster if you want multiple!
if False:
model.push_to_hub_gguf(
"hf/model", # Change hf to your username!
tokenizer,
quantization_method = ["q4_k_m", "q8_0", "q5_k_m",],
token = "", # Get a token at https://huggingface.co/settings/tokens
)
|
自动创建Modelfile
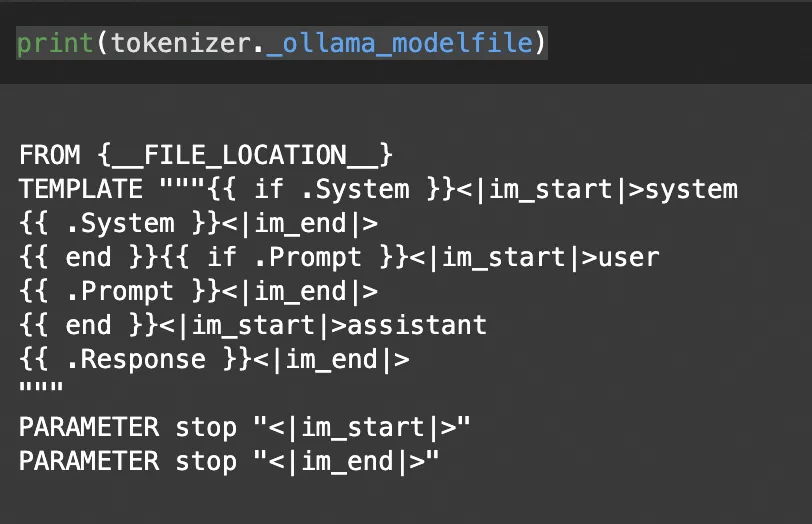
Unsloth 在转化模型为GGUF格式的时候,自动生成Ollama所需的Modelfile文件,其中包括模型的路径和我们用于微调过程的聊天模板。
1
2
| # 打印Modelfile生成的模板
print(tokenizer._ollama_modelfile)
|

创建自定义模型
需要先本地安装 ollama 服务,参考 Cloud Studio 软件环境安装 的 Ollama 安装部分的内容
使用ollama create命令创建自定义模型
1
| !ollama create unsloth_qwen2 -f /mnt/workspace/model/Modelfile
|
打开终端运行模型
1
| !ollama run unsloth_qwen2
|


